Showing posts with label Tutorial. Show all posts

Friday, January 14, 2011

Soul Restoration Reavealed...and a Tutorial


 I am so excited to be taking Soul Restoration with the gals over at Brave Girls Club. I've been receiving daily inspiration emails from the Brave Girls for the past year. So many times, these little messages are exactly what I have needed to hear. Words of encouragement, words of love, words of courage...so many beautiful words. When I couldn't find the words on my own, it was such a blessing to receive the words from them.

I thought I'd share the cover of my soul house journal - and just for the fun of it, I'm posting a tutorial on how I created it as well. This is truly the blog that keeps on giving. 

Everyone started with a blank mini-album but the covers differ among the class between canvas, denim and wood. My class kit came with a denim mini-album made by Chatterbox. It started out looking like this:

So here's what I did to alter and personalize my cover. You didn't think I was just going to show the finished project right from the get go, did you?

Step One
First, I removed the two denim loops on the top left of the cover. I knew I wanted to adhere a doily or other type of paper accent which would not lay flat on top of these loops. And yes, I did save them to use on another project. Then, I used Mister Huey's Calico White mist, Maya Mist Buttermilk Cream mist, Tattered Angels Caribbean Blue Glimmer Mist and white acrylic paint to splatter and grunge up my background. Next, I took a vintage paper doily & used Iridescent Pearl Glimmer Mist to add some sparkle. Then I used more white paint and blue mist to lightly splatter the doily. After everything dried, I used matte Mod Podge to adhere the doily to the album.

Step Two
I took a pre-pleated ribbon (made by Pink Paislee, I think) and cut it to fit the album cover. Since I wanted the red to be a bit more bold than the original dusty red color of the ribbon, I used Mister Huey's Schoolhouse mist to add that true red color. I then used 1/2" double sided Red Line Craft Tape (love this stuff!) to adhere the ribbon.

Step Three
I knew I wanted to use the bottom right corner for the title statement of my album but it took me some time to find a way to display the "I am closed for restoration" saying. Initially I thought I might place it on top of the fabric loop that was already in place on the album...but I just didn't like it...so I took that loop off and looked at other options. I decided on using a Jenni Bowlin label sticker because I really liked how the red edging complimented the ribbon. The original sticker has light black polka dots on the background of the label but I found that the dots actually distracted the eye away from the sentiment. To counter this, I simply used white acrylic paint to cover the dots. I also added a second ribbon down the left hand side, adhering with 1/4" size of that handy, dandy Red Line Craft Tape.

Step Four
I used paper from an old dictionary to construct a lovely paper lollie. If you are interested in learning how to make these, check out this video by Rhonna Farrer. She does a fantastic job demonstrating the technique. Again, I had to add some glitz over the lollie with a couple of sprays from the Pearl Maya Mist. Here's a close-up so you can see the detail of the paper lollie...

Step Five
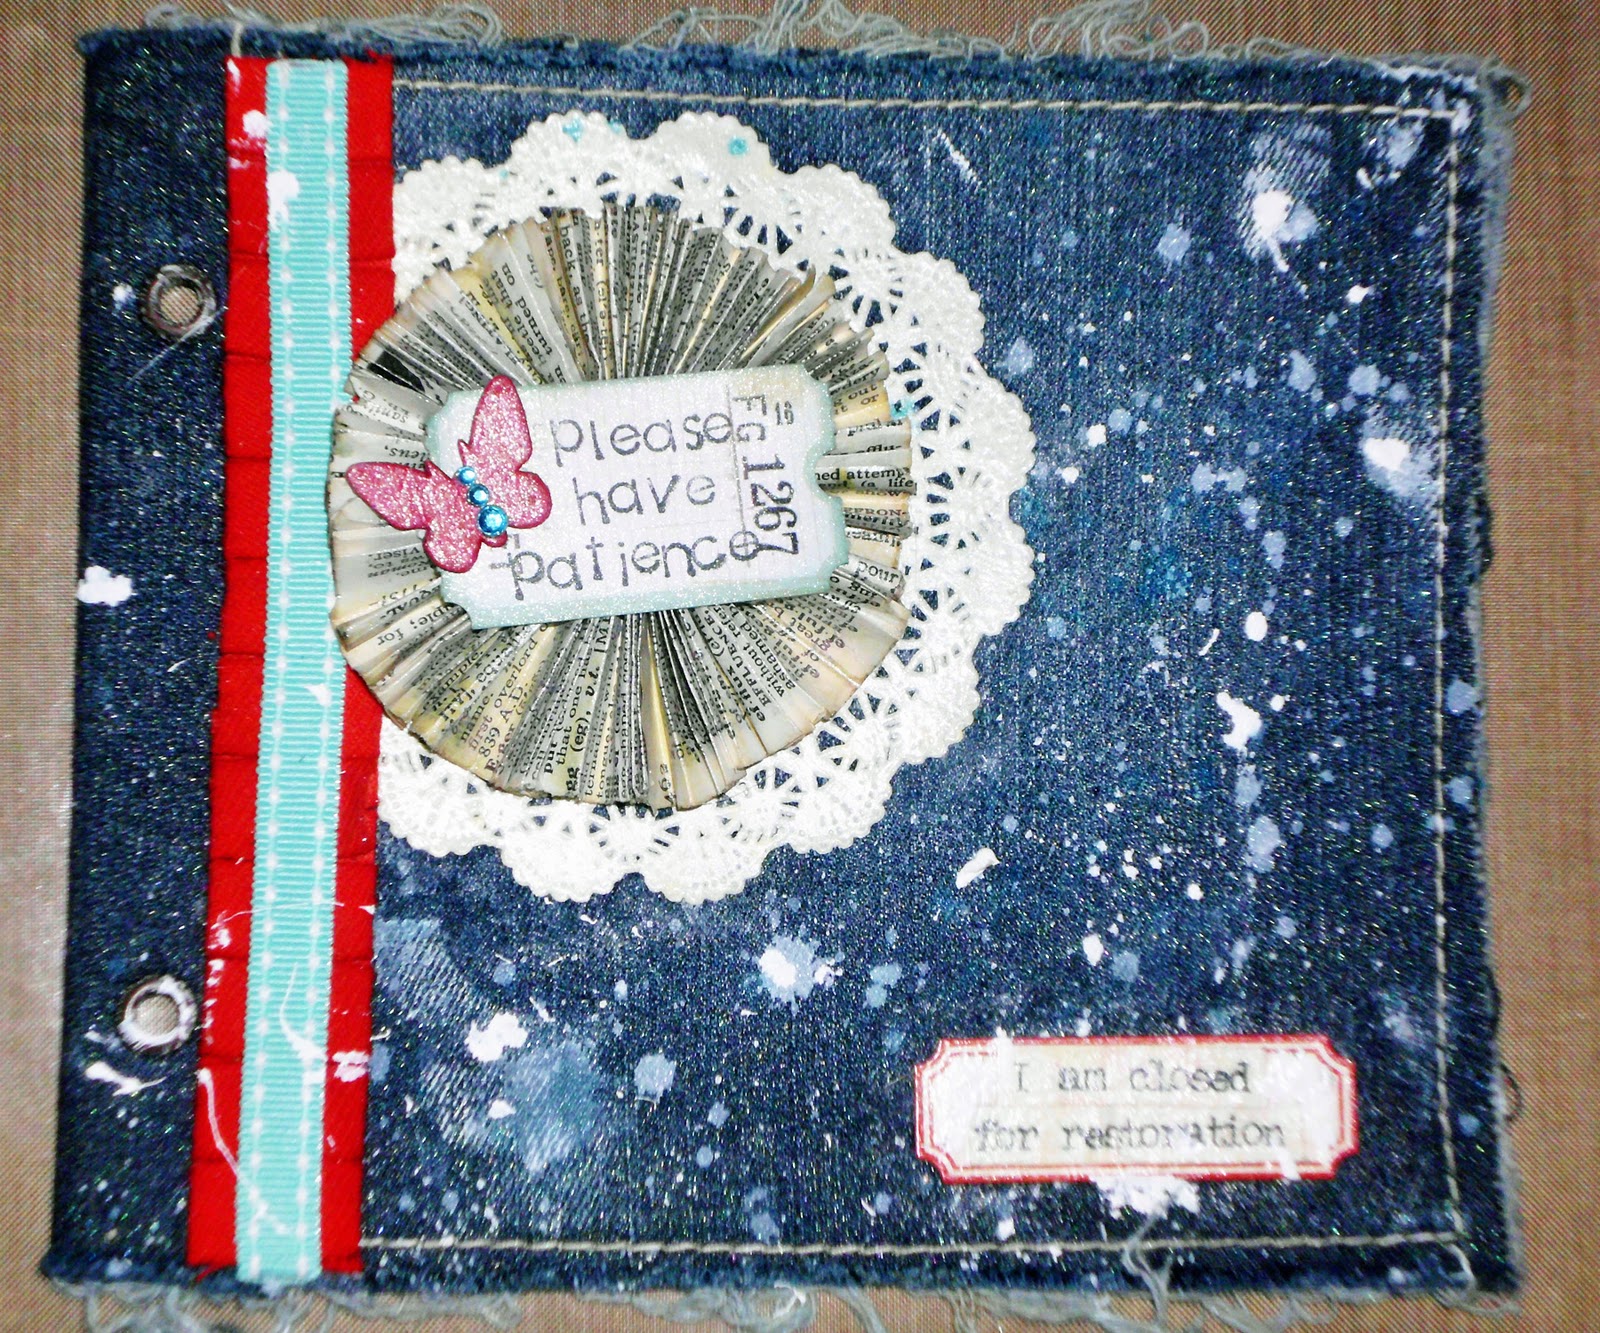
I used one of the Pink Paislee House of 3 tickets as a base of the accent atop that fabulous paper lollie. I added a bit bolder aqua blue color to the outer edges with some Tim Holtz Broken China Distress Ink and added more sparkle with the Pearl Mist. I used my Hero Arts alpha stamps to add the "please be patient" phrase. I had a plain chipboard butterfly That I misted Schoolhouse red and then added Pearl also (I just can't get away from that Pearl Maya Mist)...it is a much truer red than in my photo, actually matching the red of the ribbon exactly. Lastly, I added some Basic Grey mini pearls to the butterfly's body for just a touch more of the aqua color. Here's a detailed look at the ticket element.

Step Six

 To complete the cover I added a vintage key in the upper right aspect. I used Tattered Angels Vintage Hardware Antique Keys in black but the black color was all wrong for this project. Not to worry - I simply used acrylic paint to white wash over the key and voila! they key is now perfect.

I hope you enjoyed my first tutorial here on Studio Jenn. I certainly enjoyed sharing it. Leave me a comment if you would - I'd love to hear what you think or any questions that you might have.

Wednesday, May 26, 2010

Scrabble Nameplate Project

I came up with a really cute and easy project this past weekend. I thought I'd share it here, along with a little how-to.

Let's start with a picture of the finished project:
click on image to see larger

I so adore this project, particularly because of the  simplicity factor. So let's move right into the how-to, shall we?

I started by using aqua acrylic paint to cover the entire tile holder. I used two coats because I wanted it to be extra aqua-y, but it has a kind of cool, color wash effect with only coat so it's up to you!

Let the paint dry completely.

Decorate the back first. I used patterned paper and the Martha Stewart Crafts Butterfly Border Punch (I got mine here) to make a border for the back side. I adhered the butterflies with Modge Podge. Use a thin layer of Modge Podge on the back side of your paper and place the border onto the holder. Then use a second thin layer of Modge Podge over the top of the paper to adhere securely. Let this dry completely. Lastly, spray the entire surface of the tile holder with acrylic sealant. I used the glossy type which I bought at Hobby Lobby. Here is what the back side of my nameplate looks like:
click on image to appear larger

Now we can move on to the fun stuff - embellishing the front. I used a cluster of fabric flowers and a Jenni Bowlin chipboard butterfly to decorate mine. I used a plain old hot glue gun to adhere the elements. I placed several layers of foam square adhesives (like these) to fill in the space between the butterfly and the tile holder and added a dollop of hot glue for good measure. Lastly I used the hot glue gun to adhere the Scrabble tiles spelling my name. A closeup of the finished product looks like this:
click on image to see larger

As an alternative, you could leave the Scrabble tiles free and clear of all adhesive so you could change out the letters. Just think of all the possibilities...

I hope you enjoyed this little project. If you make one yourself, please link it up in the comments. I'd love to see your work!